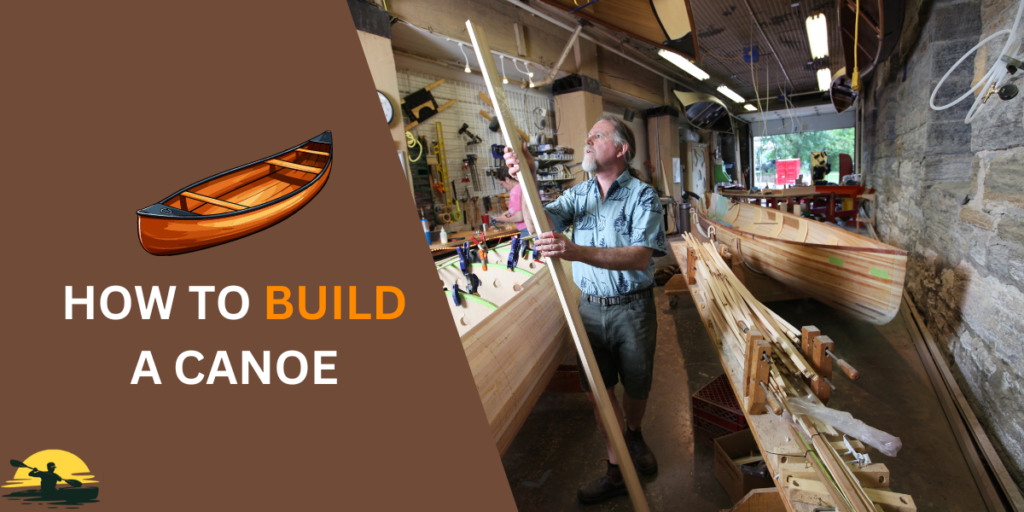
Ever dream of cruising on a lake in a canoe you built yourself?
Building your first cedar strip canoe might seem fancy, but it’s totally doable! We’ll show you exactly how, step-by-step.
You’ll learn about center lines, keel lines, and how to bend those wood strips.
With a few tools and our clear instructions, you’ll be paddling your own awesome cedar strip canoe before you know it!
- Building your cedar strip canoe is a rewarding DIY project.
- Start by creating strong forms to shape the hull.
- Steam bend or soak cedar strips for easy bending.
- Glue and staple the strips to the forms, working from the keel line upwards.
- Reinforce the keel strip and stems for structural integrity.
- Consider adding fiberglass for extra durability.
- Sand, fill gaps, and trim edges for a smooth finish.
- Paint or varnish your canoe for protection and style.
- Enjoy your unique, handcrafted canoe!
Planning Your Canoe
Alright, before we grab our tools and start boat building, let’s understand what goes into a cedar strip canoe.
The basic idea is to make a skeleton using long strips and thin strips of cedar—these are our “wooden ribs.”
We’ll carefully bend and glue them together, creating a strong but flexible shape.
Getting Started: The Frame
- Center Line: Imagine an invisible line running straight down the middle of the canoe from front to back. That’s our center line, and it’s super important to keep everything even.
- Keel Line: This is another imaginary line but on the bottom of the canoe, running along its length. It’s where we’ll start building our canoe’s base.
- Strongback: This is a sturdy frame that supports the canoe while we build it. It keeps everything straight and helps us follow those important lines we just talked about.
- Forms: These are like ribs that hold the canoe’s shape while the glue dries. We’ll place them at one-foot intervals along the strongback.
- Stems: These are the curved pieces at the front and back of the canoe. We’ll make them from marine plywood and attach them to the strongback.
Choosing Wood and Tools
You’ll need a bunch of thin cedar strips that are the same thickness and width.
It’s okay if they’re rough-cut since we’ll plan them down later. You’ll also need a few basic tools, such as a hand plane, a belt sander, and a chalk line.
If you’re up for bending wood with steam, a simple steam box will come in handy. And don’t forget the wood glue and stainless steel screws to hold everything together!
Would you be ready to start building? Let’s get to work!
Gathering Tools and Supplies
Now that we’ve got our workspace and supplies ready let’s get those cedar strips onto our canoe’s skeleton!
This is where the real magic happens, and your canoe starts taking shape.
- Bending Wood: Remember those cedar strips? We’re going to bend them around the forms to create the canoe’s curves. There are a few ways to do this. You can soak them in water, use a heat gun, or even build a simple steam box. (Don’t worry, we’ll cover those methods in more detail later!)
- Gluing and Stapling: Once you’ve bent a strip into the right shape, it’s time to glue and staple it to the forms and the stems. Could you make sure to use good waterproof wood glue and stainless steel staples that won’t rust?
- Building Up the Hull: Start at the keel line and work your way up the sides, adding strips one by one. You’ll see the canoe’s hull start to take shape. Make sure each strip lines up nicely with the one below it—this will give you a strong and smooth finished canoe.
- Sheer Line: As you get closer to the top of the canoe, you’ll start following the sheer line. This is the gentle curve that runs along the top edge of the canoe. It’s what gives the canoe its classic look.
- Outer Stems: Once you’ve reached the top, it’s time to attach the outer stems. These are just like the inner stems, but they go on the outside of the hull to give the canoe its finished shape.
Remember, take your time and enjoy the process!
Building a canoe is a rewarding experience, and the result will be a one-of-a-kind boat that you can be proud of.
Building the Canoe
Okay, you’ve got the strips on the canoe. Now, we’re going to make it strong and watertight!
Making it Strong
You’ll notice some gaps between the strips. We need to fill those in, and there are a few ways to do this.
- Butt Joints: This is where you glue two strips together end to end. To make the joint stronger, use a small piece of fiberglass cloth and epoxy on the inside of the canoe.
- Scarf Joints: This is a fancier way to join the strips. You cut the ends at an angle and overlap them, then glue them together. This makes a really strong joint and looks pretty cool, too.
The Bottom and the Stems
- Keel Strip: The keel is the bottom of the canoe, so it needs to be extra strong. We’ll use a wider strip of wood for this and make sure it’s glued and screwed securely to the stem and the ribs.
- Inner and Outer Stems: To make the stems strong, we’ll glue several layers of marine plywood together. Remember to cut them to match the shape of the canoe!
- Fiberglass: Years ago, people didn’t use fiberglass, but nowadays it’s pretty common. You can use a single sheet of fiberglass cloth to cover the entire hull. It adds a lot of strength and makes your canoe last longer.
Gluing and Clamping
Once you have everything in place, it’s time to glue it all together! Here are a few tips:
- Clamping Pressure: Use lots of clamps to hold everything together tightly while the glue dries. If you don’t have enough, you can even make your clamps.
- Baking Paper: Put a layer of baking paper between the clamps and the wood to prevent the glue from sticking to the clamps.
- Patience: Let the glue dry completely before you move on to the next step. This might take a couple of days, but it’s worth it!
Once the glue is dry, you’ll need to sand the entire canoe smooth.
Then you’re ready for the fun part—fiberglassing and finishing! It might sound tricky, but with a bit of practice, it’s pretty easy. Just take your time and follow the instructions carefully.
Before you know it, you’ll be paddling your very own homemade canoe!
Finishing Touches and Customization
Alright, you’ve built up the hull, sanded it smooth, and maybe even fiberglassed it.
Now comes the part that really makes your canoe shine – the finishing touches!
Sanding
First things first, we want our canoe to be super smooth. So grab some sandpaper and get to work!
Start with a coarse grit to remove bumps or rough spots, and then gradually move to finer grits until the canoe feels silky smooth to the touch.
A power sander can help speed up this process, but be careful not to sand too much in one spot.
Filling Gaps
Next, could you take a close look at your canoe and see if there are any tiny gaps or holes? If so, you can fill them with a mixture of wood glue and sawdust.
Just mix them until you get a thick paste, then apply it to the gaps with a putty knife. Once it dries, sand it smooth, and you’re good to go!
Trimming
Now, it’s time to trim any excess wood or fiberglass from the edges of your canoe.
You can use a saw or a router for this, depending on what tools you have on hand. Be careful not to cut into the hull of the canoe.
Finishing Touches
Once the canoe is sanded, filled, and trimmed, it’s ready for the final touches.
You can paint or varnish it to protect it from the elements and make it look even more awesome. If you’re painting, be sure to use marine-grade paint designed for boats.
If you’re varnishing, apply several thin coats for the best results.
Now, stand back and admire your handiwork! You’ve just built your very own canoe from scratch. It wasn’t easy, but it was definitely worth it.
Conclusion
It’s been a journey, but you’ve learned a ton about woodworking skills, using different materials like marine ply and wood strips and making boats something amazing.
Remember, this is just the first step. Now that you know the basic idea, you can explore different canoe designs, experiment with other materials, and even build a whole fleet of canoes!
But most importantly, get out there and enjoy your new canoe!
If you run into any bumps along the way (literally or figuratively), remember: you built this canoe, and you can handle anything!
Frequently Asked Questions
What’s the best way to bend those wood strips?
There are a few ways you can bend cedar strips. Soaking them in boiling water for a while makes them easier to shape. A steam box is the best way to get a really nice, even curve. A heat gun can also work in a pinch, but be careful not to scorch the wood!
Can I build a canoe without fiberglass?
Absolutely! For centuries, people built canoes without fiberglass. It adds extra durability, but it’s optional, especially if you’re mainly paddling in short distances or calm waters. Just make sure your butt joints and scarf joints are well-sealed.
How do I make sure the hull stays straight?
That’s where the strongback and forms come in handy. They act like a backbone and ribs, keeping the canoe’s shape while you build it. Make sure to double-check your measurements and use a straight line to ensure everything is aligned. Canoe-making is a very fun part of it.
How do I attach the outer stems?
The outer stems are glued and screwed to the inner stems to create a strong connection and give your canoe a finished look. Could you make sure they follow the sheer line for a smooth curve along the top edge?
How many coats of epoxy should I apply?
Two coats of epoxy should be sufficient to create a watertight seal and protect your canoe. Could you let each coat dry completely before applying the next? This process might be a bit time-consuming, but it’s an important factor in ensuring the longevity and structural integrity of your canoe.