Paddle boarding is a total blast. But every so often, your board might get dinged up.
Maybe you hit a rock, or your furry friend got a little too excited. Don’t worry, though!
You can totally fix those minor dings and scratches yourself without spending a ton of money at a repair shop.
In this guide, we’ll show you how to patch a paddle board like a pro.
You’ll learn what to do if your board gets punctured or torn, and we’ll even share some tips to help you avoid future damage. Get ready to get back on the water in no time!
How to Patch a Paddle Board
- Assess the damage: Puncture, tear, ding, or delamination?
- Gather your tools: Patch kit, sandpaper, cleaning solution, gloves, etc.
- Prep the area: Clean and sand around the damage.
- Apply the patch: Follow the instructions in your repair kit.
- Let it dry: Allow at least 24 hours for the adhesive to cure.
- Test it out: Inflate your board and check for leaks before hitting the water.
- Call in the pros: For major damage or if you’re unsure, seek professional help.
Understanding Paddle Board Damage
Alright, before we jump into fixing your paddle board, let’s figure out what kind of damage we’re dealing with.

The most common types of damage you’ll see on an inflatable paddle board are:
- Punctures: These are small holes, usually caused by sharp objects.
- Tears: These are bigger rips, and they can be a bit trickier to fix.
- Dings and Scratches: These are more like surface damage, and they don’t usually affect how your board works.
- Delamination: This is when the layers of your board start to separate. It’s less common, but it’s important to know about.
So, take a close look at your board. What kind of damage are you seeing? Once you know what you’re dealing with, you can grab the right repair kit. Most paddle board repair kits come with everything you need to fix punctures and tears, like patches and adhesive. Some kits even include tools for fixing delamination.
Now, here’s the thing: It’s super important to follow the instructions that comes with your repair kit. They’ll tell you exactly how to prepare your board, how to apply both the patch and the adhesive, and how long to let it dry. Follow the instructions to ensure your repair is maintained.
In the next section, we’ll go over the tools and materials you’ll need for your repair. So, stick around!
Tools and Materials for Paddle Board Repair
Okay, now that you know what kind of damage you’re dealing with, let’s gather everything you’ll need to fix your board. Here’s the basic stuff:

- Patch Kit: This is the most important thing you’ll need. It usually comes with patches (different sizes), adhesive, and sometimes even sandpaper, as well as a cleaning solution.
- Sandpaper: You might need different grits (roughness levels) of sandpaper to smooth out rough edges or prep the area for patching.
- Cleaning Solution: This usually involves rubbing alcohol or acetone. You’ll use it to clean the area around the damage before you apply the patch.
- Gloves: These are optional, but they’ll help keep your hands clean and protect them from the adhesive.
- Masking Tape: This can be helpful for holding patches in place while the glue dries, especially for bigger tears.
- Scissors: For trimming patches to the right size.
Now, if you’re dealing with a bigger tear or delamination, you might need some extra tools:
- Heat Gun: This could help soften the adhesive and make it easier to work with for delamination repairs.
- Epoxy Resin: This is a strong adhesive that’s good for fixing bigger holes or tears.
Here are a few tips to keep in mind:
- Check Your Kit: Make sure your patch kit includes instructions. They’ll tell you exactly what to do and how to use the materials in your kit.
- Buy Extra Glue: It’s always a good idea to have some extra glue on hand, just in case.
- Apply Glue Separately: Don’t apply glue to both the patch and the board. Apply it to one surface, then stick them together. This helps prevent air bubbles and excess glue from getting trapped.
- Work in a Well-Ventilated Area: Some adhesives have strong fumes, so it’s important to work in a place with good airflow.
Alright, now that you have everything you need, let’s get to patching!
Step-by-Step Paddle Board Patching Guide
Alright, let’s get down to business! Here’s how to fix your inflatable SUP board, step by step:

Get Ready
- Find a clean, dry spot to work. Your garage or a clear area in your yard works great.
- Make sure your board is clean and dry. If it’s wet or dirty, the patch won’t stick properly.
- Get all your tools and materials together. You want to avoid searching for stuff in the middle of your repair.
Prep the Area
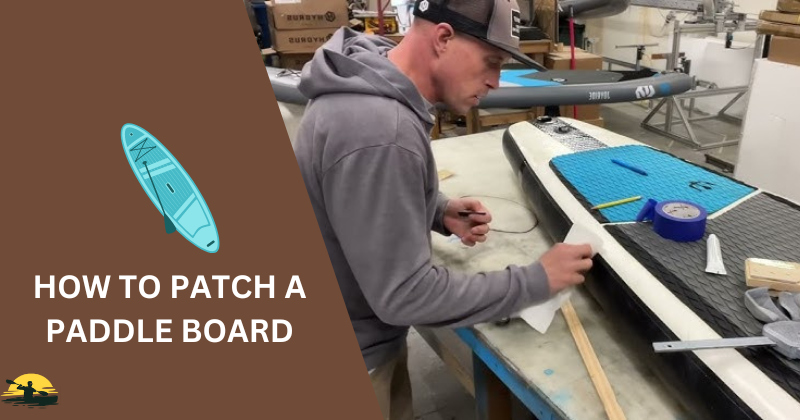
- Punctures or Small Tears: Use the sandpaper from your repair kit to gently rough up the area around the damage. This helps the patch stick better.
- Bigger Tears: You might need to trim the edges of the tear with scissors to make them smooth and even.
Apply the Patch
- Simply follow the instructions in your repair kit for applying the adhesive. Usually, you’ll put a thin layer of glue on the patch and let it dry a bit before sticking it on the board.
- Center the patch over the damage and press it down firmly. Make sure there are no air bubbles trapped under the patch.
- If the tear is small, you can skip this step. If it’s a bit bigger, apply masking tape around the edges of the patch to hold it in place while the glue dries.
Patching Bigger Tears
- If you’re dealing with a bigger tear, you should patch it from the inside of the board, too.
- Deflate your board and find the spot where the tear is.
- Clean and sand the area around the tear on the inside.
- Apply a patch to the inside of the board, just like you did on the outside.
Let it Dry
- This is the most important part! Let the glue dry completely before you use your board again. The instructions in your repair kit will tell you how long to wait. Usually, it takes at least 24 hours.
Test It Out
- Before you head out on the water, inflate your board and check for leaks. Put some soapy water around the patched area. If you see bubbles, it means there’s still a leak. You should reapply the patch.
Alright, you did it! You just patched your paddle board like a pro. Now, let’s go over some extra tips to make your repair even better.
Additional Tips for a Successful Paddle Board Repair

Here are some extra tips to help you get the best results when patching your SUP board:
Patience is Key
Don’t rush the process. Take your time with each step, & make sure your glue is completely dry before using your board again.
Apply Pressure
After you place the patch, press down on it firmly to make sure it’s sticking properly. You can use a roller or even a credit card to apply pressure.
Check for Leaks
Even if you think you’ve patched your board perfectly, it’s always a good idea to check for leaks before you hit the water. Inflate your board and listen for hissing sounds, or look for bubbles in soapy water.
Store Your Board Properly
When you’re not using your board, store it in a cool, dry place. Please don’t leave it in direct sunlight or extreme temperatures, as this could damage the material.
Use a Valve Wrench
If you need to deflate your board for a repair, use a valve wrench to open and close the valve. This will simply help prevent damage to the valve.
Clean Your Board Regularly
After each use, rinse your board with fresh water and let it dry completely before storing it. This will help prevent dirt & grime from building up, which can make it harder to patch your board if it gets damaged.
Avoid Sharp Objects
Be careful when you’re out on the water, and avoid paddling over sharp rocks or debris. This will help prevent punctures and tears in the first place.
Remember, a little care and attention could go a long way in keeping your SUP board in top shape. By following these tips, you can simply enjoy countless hours of fun on the water.
When to Call in the Pros

Even though patching up your inflatable paddleboard is pretty easy, there are a few times when it’s better to leave it to the experts. Here’s when you should take your board to a repair shop:
- Big Tears: If your board has a tear bigger than a few inches, it might be too big to fix yourself. The pros have special tools and materials for fixing major damage.
- Multiple Punctures: If your board has a bunch of small holes, it might be easier (and faster) to have a pro fix it.
- Delamination: If the layers of your board are separating, it’s definitely time to call in a pro. This kind of repair requires special skills and tools.
- Unsure About the Repair: If you need help fixing the damage, or if you’re worried about making it worse, feel free to take your board to a shop.
Finding the Right Repair Shop
If you do need professional help, here are a few tips for finding a good repair shop:
- Ask Around: Talk to other paddle boarders or check online forums for recommendations.
- Look for Experience: Choose a shop that has experience repairing inflatable paddleboards.
- Get an Estimate: Before you leave your board with a shop, get an estimate for the repair. That way, you won’t be surprised by the cost.
- Check for Warranties: Some shops offer warranties on their repairs. This can give you peace of mind, knowing that if something goes wrong, they’ll easily fix it for free.
DIY vs. Professional Repair

Should you fix your board yourself or take it to a shop? It really depends on the damage and your comfort level with DIY repairs.
If it’s a small puncture or tear and you’re feeling handy, give it a shot! But if it’s a bigger issue or you’re not sure what to do, it’s always better to be safe and take it to a pro.
Now, you might be wondering, “What if I mess up my DIY repair?” Well, don’t worry too much. You can always take your board to a shop later if things don’t go as planned.
Just be honest with the repair person about what you did so they can assess the damage and come up with the best repair solution.
And remember, there are different repair solutions for various kinds of damage. For example, you might use round patches for punctures and larger patches for tears.
If you’re not sure what to use, ask at your local paddleboard shop. They’ll be happy to help you out.
Finally, here’s a quick tip: If you’re having trouble finding a leak, mix up a soapy water solution and spray it on your board. Bubbles will form where the air is escaping, making it easier to spot the leak.
Conclusion
There you have it! You’ve learned how to fix your paddle board like a champ. Remember, most minor dings and punctures are a piece of cake to fix yourself with a simple paddle board repair kit.

Just take your time, follow the instructions, and be patient.
If you run into something a little more serious, don’t sweat it.
There are plenty of pros out there who can help you get back on the water in no time.
The most important thing is to enjoy your time on the water and not let a little mishap ruin your fun.
So get out there, explore, and have a blast! And next time your board gets a little beat up, you’ll know exactly what to do. Happy paddling!
Frequently Asked Questions
Can I patch my paddle board while it’s inflated?
It’s best to deflate your board before patching it. This makes it easier to apply the patch and adhesive properly, ensuring a stronger and more durable repair.
What type of glue is best for patching an inflatable paddle board?
Most paddle board repair kits come with a special adhesive designed for inflatable materials. It’s important to use the right kind of glue to ensure a secure and long-lasting repair.
How long does it take for a paddle board patch to dry?
Drying time varies depending on the type of adhesive used and the environmental conditions. However, most patches take at least 24 hours to cure fully. It’s important to be patient and let the glue dry completely before using your board.
Can I use a regular bike tire patch kit to fix my paddleboard?
While both use similar materials, it’s recommended to use a patch kit specifically designed for inflatable paddle boards. These kits are made with materials that adhere better to the PVC material of paddle boards, ensuring a more reliable repair.
How do I know if my paddle board is leaking air after I’ve patched it?
Inflate your board and listen for hissing sounds, or apply a soapy water solution around the patched area. If you see the bubbles forming, it indicates a leak, and you may need to reapply the patch.


